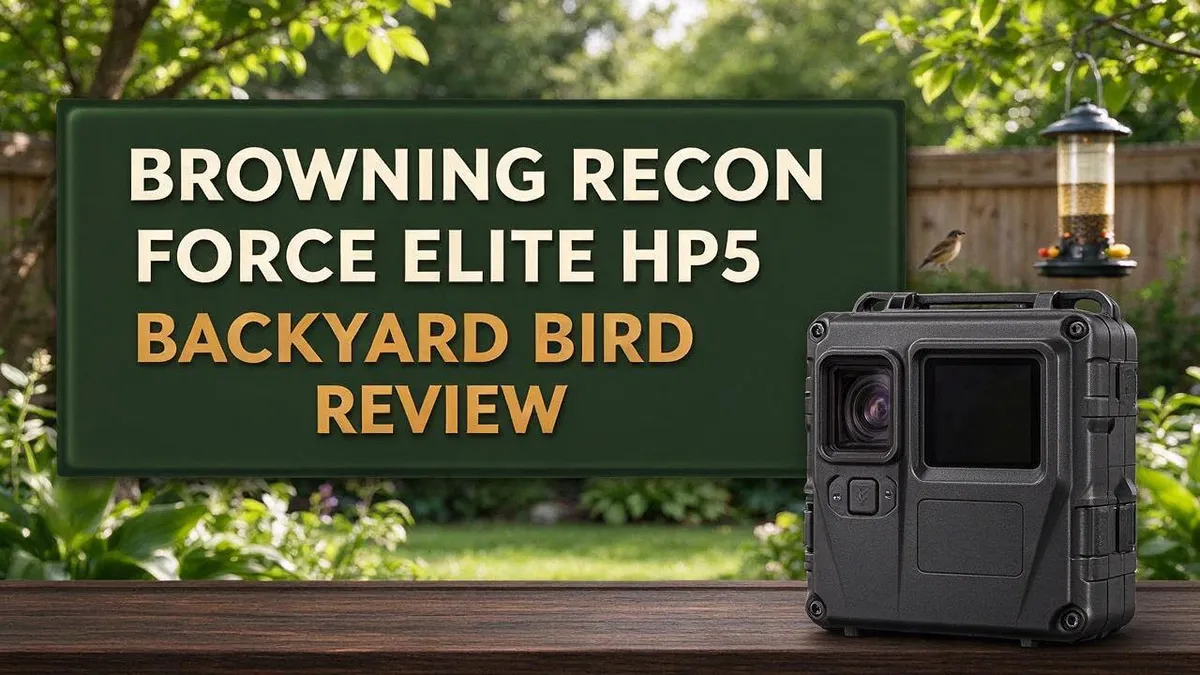
Browning Recon Force Elite HP5 Review: Worth It in 2026?
Do you love watching birds at your feeder? A good trail camera can capture every visit, even when you are away.
The Browning Recon Force Elite HP5 aims to do that job well. It packs a 24MP sensor and a wider angle lens than the HP4.
Reviewers praise its sharp, detailed images. They also like its durable build and simple controls. Image quality stays consistent, and performance feels reliable.
In a Nutshell
- Best for: Backyard bird fans and anyone who wants to watch wildlife in wooded areas. The camera suits both feeder spots and quiet trails.
- Built to last. Reviewers describe the HP5 as durable. It can sit outside through many days of rain, sun, and animal visits.
- Easy to use. Setup feels simple, even for first time trail camera owners. You can mount it, switch it on, and walk away.
- Steady performance. The HP5 gives consistent results from one visit to the next. That helps you track the same birds over several weeks.
- Wider view. The lens covers a wider angle than the HP4. You can capture more of your feeder area in a single frame.
- Good to know. You must pull the SD card by hand to see your photos. Plan a quick check routine for it. The Browning Recon Force HP4 and Recon Force Edge make good models to compare.
Image Quality and Sensor Performance

Last update on 2026-11-19 / Affiliate links / Images from Amazon Product Advertising API Some of the links on this website are affiliate links, which means that at no additional cost to you, I earn a commission if you click through and make a purchase. I only recommend products and services that I believe will add value to my readers. Thank you for your support!
Image quality often decides whether a trail camera earns a spot in your yard. The HP5 relies on a 24MP sensor to capture fine detail. That detail matters when birds are small or sitting far from the lens.
Think about a sparrow at a feeder. In a blurry photo, it looks like any other brown bird. With enough pixels, you can crop the shot and spot wing bars, eye rings, and beak shape.
The detection sensor also shapes image quality. It wakes the camera when a bird moves into view. A fast trigger helps you catch the bird on the perch instead of an empty branch.
Feeder setups need clean framing. The view should show the feeder, the perch, and the ground below. Mount the camera at a slight angle so the sun does not shine straight into the lens.
Light changes everything. Morning sun, cloudy skies, and shade all affect color. Take a few test shots at different times of day. This shows how the HP5 handles your yard’s lighting.
Wooded areas bring their own challenges. Branches and leaves can block the view. Trim small twigs in front of the lens so birds stay visible.
Dust and pollen soften images over time. A quick wipe with a soft cloth keeps every feather sharp. Clean lenses also help the sensor produce natural colors.
Test first, then trust the results. Once you understand how the sensor handles your setup, you can adjust placement with confidence. Clear images make every visit worth watching.
Lens Field of View and Detection Sensor
The lens decides how much of your yard fits in each photo. The HP5 uses a wider angle lens than the HP4. That means it covers more ground in front of the camera.
Wider framing helps with perches and feeders. Small birds move fast. They land, hop, and leave in seconds. A broader view gives those quick visits a better chance of staying in the frame.
Placement still matters a lot. A wide view can also pull in extra clutter. Swaying grass or bright sky may appear in the shot. Aim the camera so the feeder sits near the center.
The detection sensor works like a quick trigger. It wakes the camera when it senses movement. Birds can set it off in an instant.
A sensor that triggers too early may miss the first moment of a landing. A sensor that waits too long may skip the bird entirely. Test the trigger speed in your yard before you rely on it.
The lens and sensor work as a team. The wider lens gives birds room to move through the frame. The detection sensor decides when the shutter fires. Together, they shape how many useful photos you collect.
When the trigger fires at the right moment, you see fewer blank frames. That keeps your review quick and easy.
Plan a short test week. Watch which photos show birds clearly. Adjust the angle, height, or distance if the frame feels crowded or too empty. Small changes often bring big gains.
Build Quality and Weather Durability
Your trail camera spends every day outdoors. It faces rain, wind, heat, and sudden cold snaps. A strong shell keeps the electronics dry and working.
Start with the housing. Hold the HP5 and the solid feel stands out. The body seems built to resist knocks from branches and falling twigs. Check that the cover closes flush each time you service it.
Seals matter most after storms. Small gaps let moisture creep inside over weeks. Before you mount the camera, look at the latch and the seam. Wipe away grit so the seal sits tight.
Temperature swings test every part. Cold mornings and hot afternoons make plastic and metal expand and contract. A well built unit handles this stress without cracking. Mounting it in partial shade can ease heat buildup.
Mounting hardware holds the camera steady. Wind can shake a loose strap and blur your photos. Tighten the strap until it grips firmly, but avoid crushing the housing. Recheck the mount after heavy rain or gusty weather.
Batteries feel the cold too. Low temperatures drain power faster than most people expect. Keep spare batteries in a sealed bag. Swap them during winter checks so the camera stays active.
Plan a simple maintenance routine. Inspect the lens cover, seals, and mount every month. Clean the lens with a soft cloth. Note any damage in a notebook so you can track changes over time.
Trust the build, then verify it. The HP5 looks ready for outdoor life. Still, your own yard tests the gear best. Watch how it performs through one full season before you call it reliable.
Top 3 Alternatives
Looking for a different trail camera? These three options work well for backyard bird watchers and wildlife fans. Each one offers something a little different.
Wingscapes BirdCam Pro


Last update on 2026-07-13 / Affiliate links / Images from Amazon Product Advertising API Some of the links on this website are affiliate links, which means that at no additional cost to you, I earn a commission if you click through and make a purchase. I only recommend products and services that I believe will add value to my readers. Thank you for your support!
This camera focuses on bird activity around feeders and yards. It takes clear photos and short videos during the day. Many users like its simple setup and easy menu.
Its design suits people who want to watch birds up close. You can check your camera’s images each morning without much effort. It works well for beginners who want fun, useful results.
Browning Recon Force Edge

Last update on 2026-11-22 / Affiliate links / Images from Amazon Product Advertising API Some of the links on this website are affiliate links, which means that at no additional cost to you, I earn a commission if you click through and make a purchase. I only recommend products and services that I believe will add value to my readers. Thank you for your support!
This model suits hunters and nature lovers who need fast triggers. It captures quick movement with sharp detail. Setup takes only a few minutes.
Its tough build handles rain, dust, and cold weather. You get dependable images in most conditions. It is a good pick for people who spend long hours outdoors.
Stealth Cam G45NG

Last update on 2026-11-19 / Affiliate links / Images from Amazon Product Advertising API Some of the links on this website are affiliate links, which means that at no additional cost to you, I earn a commission if you click through and make a purchase. I only recommend products and services that I believe will add value to my readers. Thank you for your support!
This camera offers a budget-friendly way to monitor your yard. It records photos and videos day and night. Many owners praise its long battery life.
Its compact body hides easily on a branch or post. The camera keeps watch quietly and stays out of sight. It makes a great choice for anyone who wants simple, reliable results.
Setup and Ease of Use
Getting started with the Browning Recon Force Elite HP5 feels simple. Most people finish the first setup in one sitting. Set aside a few quiet minutes before you head outside.
Begin with the date and time. Set the clock first so every photo carries an accurate timestamp. This habit makes it easy to match a bird visit to the right morning or afternoon later on.
Next, choose the capture settings that suit your yard. Many trail cameras offer photo and video options. Photos work well for quick snapshots of a sparrow at a feeder, while video helps you study longer visits from larger birds.
Mounting comes next, and it sets the tone for your whole session. Attach the camera to a sturdy post or tree at about chest height. Aim it slightly downward so birds stay visible in the frame.
Use a walk test before you leave. Walk through the area and confirm that the camera records each pass. This quick check shows whether the camera catches movement from every angle you need.
The controls also matter for everyday ease of use. Beginners can usually learn the basic buttons and menus quickly. Clear prompts guide you through each step, so you rarely need to guess what comes next.
Keep a short setup checklist near your gear. Note the date, the camera position, and the sensitivity level you chose. Written notes make later adjustments much easier. Over time, these records reveal which spots bring the best bird visits.
Finally, expect a short learning curve at each new location. Small changes in height or angle can shift results quite a bit. A calm, patient approach helps you enjoy the process from day one.
Image Transfer and the SD Card Workflow
Every photo stays on the SD card. The HP5 has no wireless link to your phone or computer. You must visit the camera to collect your pictures.
Plan your visits before you start. Pick a fixed day each week for checking the card. A regular rhythm keeps your memory space from filling up without warning.
Before removing the card, switch the camera off. This protects the card and the files stored on it. Powering down first also prevents a partly saved file from getting lost.
Next, slide the card into a card reader. Copy the files to a folder on your computer. Give the folder a clear name, such as the location and the date.
Keep a spare card on hand. Swap in a fresh card during each visit. Then you can review the old files at home without rushing back outside.
Sort your files after each transfer. Delete blurry frames and near duplicates. This habit saves time and keeps your bird library easy to browse.
Check that the copy worked. Open a few random photos from the new folder. If they display cleanly, you can safely format the card in the camera.
Format the card inside the camera, not on your computer. This step keeps the file structure matching what the HP5 expects. It also helps avoid errors during the next capture session.
Store the cards in a labeled case. Label each card with its location and date range. Organized cards make it easy to find a specific bird sighting months later.
A quick note on card size helps too. Choose a card with enough room for a full season. Larger cards let you wait longer between visits without losing shots.
Best Placement for Backyard Birds and Wooded Areas
Good placement starts where birds already gather. Look for a feeder, a bird bath, or a dense shrub. These spots draw regular visitors, so your camera has more chances to capture them.
Mount the camera about four to six feet off the ground. This height keeps the lens close to the level of most songbirds. Shots taken from above often show only the tops of heads.
Sun direction shapes every photo. Avoid aiming the lens straight into morning or evening sun. Strong glare can wash out feather colors and create harsh shadows on the subject.
Wooded areas call for a different plan. Choose a game trail, a fallen log, or the edge of a clearing. Wildlife often uses these routes again and again, which gives you steady activity.
Clear away loose branches and tall grass in front of the lens. Moving plants can set off the sensor even when no bird is present. Trim them back before each visit.
Keep the background simple. A plain backdrop of bark, brush, or leaf litter helps birds stand out. Busy patterns make small birds harder to spot in the final photos.
The wider angle lens works well for feeding zones. Its broader view covers more ground, so you can place the camera farther from the food. Less disturbance helps birds act more naturally.
Test a few spots before settling in. Try distances of about 10 to 15 feet from the feeder. Compare the results after a day or two, then keep the position that shows the most birds in clear frames.
Pros and Cons
Pros
- Sharp and clear images show each bird in fine detail.
- Detailed photos reveal feather patterns and small markings.
- The durable build holds up well outdoors.
- Image quality stays consistent from shot to shot.
- Reliable performance keeps the camera working when you need it.
Cons
- The camera has no wireless link to your phone or computer.
- Photos stay on the card until you remove it by hand.
- Daily photo checks take extra time without a live connection.
- Buyers who want instant alerts may need a different model.
Who Should Buy It
The HP5 suits people who enjoy a practical routine. You walk out, check the card, and see which birds visited. Many people find this calm and rewarding. Others may see it as a chore.
Beginners in wildlife photography also gain a lot here. They learn how light, distance, and angle change each frame. Because no app needs setup, the focus stays on the photos themselves.
Bird identifiers make a good match too. Small markings and feather patterns help you name species from home. Many enthusiasts enjoy comparing shots with a field guide over a cup of coffee.
Families can share the hobby as well. Children can help sort files, pick favorite shots, and guess which bird visits most. This turns a simple camera into a fun family project.
Nature students and hobby researchers fit well too. Sharp images let them record visit patterns across several weeks. Those notes can show which species appear at dawn, midday, or dusk.
Owners of wooded properties may benefit most. Trails, shrubs, and fallen logs draw many species. The camera handles those busy scenes with ease.
Some shoppers should look elsewhere first. People who want to watch birds on a phone screen in real time will struggle. Those who rarely visit their property may also find long gaps between photo checks frustrating.
Shoppers who like Browning gear can compare the HP4 and Recon Force Edge before deciding. Each model suits a slightly different style of shooting. Reading the details before you commit leads to a happier result.
Final Verdict
The Browning Recon Force Elite HP5 earns a strong recommendation for backyard bird fans. It does the main job very well. It captures birds in a way that makes you want to look at every photo.
The camera shines in its simplicity. You set it up, walk away, and come back to a card full of visitors. That steady routine makes the hobby relaxing.
The HP5 also feels like a confident step up from the HP4. The 24MP sensor gives you more room to crop and zoom. You can share a close-up of a cardinal without losing detail.
The missing wireless link is the one real trade-off. You must visit the camera and collect the card yourself. Some people will find that a chore. Others will enjoy the small walk outside.
Here is a quick summary of the final call:
- Image results: Excellent for the hobby
- Ease of use: Simple for new owners
- Outdoor reliability: Dependable season after season
- Connectivity: Limited, so plan for manual checks
I suggest the HP5 to anyone who values photo quality over convenience features. It rewards patience. It also gives you a clear record of who visits your yard and when.
If you want live alerts, look at other options first. If you want sharp, dependable bird photos, this camera fits the job.
Bottom line: The Browning Recon Force Elite HP5 is a smart, reliable pick for turning your backyard into a bird gallery. Set it near your feeder, check the card often, and enjoy the surprises.
Frequently Asked Questions
What does the 24MP sensor mean for my photos?
A 24MP sensor captures plenty of detail in every shot. You can crop a photo to focus on one bird. The image stays clear even after you zoom in.
How does the wider lens help at the feeder?
The wider lens captures more of the feeding area in one frame. Birds that land on nearby perches or the ground often stay in view. You see more of the scene without moving the camera.
What does the detection sensor do?
The detection sensor watches for movement near the camera. When a bird arrives, it triggers the shutter. This helps you catch quick landings that you might otherwise miss.
How do I view the photos on my computer?
Remove the SD card and place it in a card reader. Plug the reader into your computer. Copy the images into a folder and sort them by date. This makes it easy to see which birds visited each day.

Hello, I’m Emily Price, the founder of Birds Affection. As a passionate bird enthusiast and spiritual seeker, I’ve always been fascinated by the symbolic meanings and mystical connections between birds and our lives. On this website, I share my knowledge and insights on the spiritual significance of various bird species, exploring their roles as messengers, guides, and teachers. Through my writing, I aim to inspire and educate others on the profound wisdom and beauty that birds bring to our world. Join me on this journey as we delve into the enchanting realm of bird symbolism and discover the hidden meanings behind these magnificent creatures.