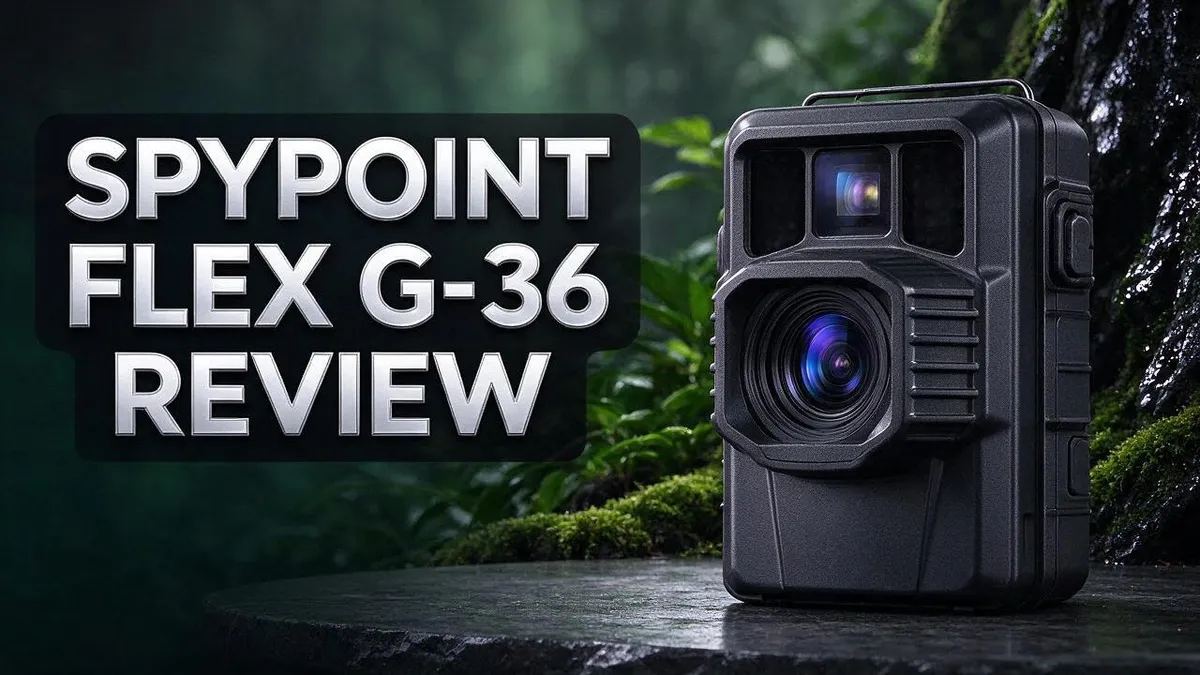
Spypoint Flex G-36 Review: Is It Worth Buying?
Want sharper trail cam photos without driving out to check your camera? The Spypoint Flex G-36 aims to deliver exactly that.
This cellular trail camera captures 36MP photos that look clear and detailed. Reviewers call it a big step up from earlier Spypoint models.
It also uses the X95 “extra safe” trigger and offers four capture modes: Photo, Video, Time Lapse, and Time Lapse+. Compared with the Flex-M, it brings better battery life and stronger connectivity.
In a Nutshell
- Best for: Hunters and landowners who want clear, detailed images sent straight to their phones, so they can check activity from home.
- Biggest strength: Image quality. Reviewers describe the pictures as a significant step up from earlier Spypoint models.
- Why cellular matters: The camera sends photos remotely. You make fewer trips into the field, which helps keep human scent and disturbance low.
- Setup advantage: The Flex G-36 suits both a single spot and a wider property. You can match the camera to your scouting goals and add more units as your needs grow.
- What to check first: The research found no clear drawbacks. Still, you should confirm that cellular coverage reaches your hunting area before you buy.
- Bottom line: This is a strong pick for anyone who values sharp images and remote access. It looks like a smart upgrade for current Spypoint users who want a clearer view of their land.
Image and Video Quality

Last update on 2026-10-13 / Affiliate links / Images from Amazon Product Advertising API Some of the links on this website are affiliate links, which means that at no additional cost to you, I earn a commission if you click through and make a purchase. I only recommend products and services that I believe will add value to my readers. Thank you for your support!
Image quality shapes how useful a trail camera feels day to day. Good photos help you spot a buck’s rack or a hog’s size without guessing.
The Flex G-36 gives you plenty of detail to work with. Each shot shows fine textures, so you can study animals and tracks.
Detail helps you judge the scene. Wide landscape shots show fence lines, feeders, and game trails. You can see where animals move before you visit the spot.
Think about how you will view the photos. Most owners check images on a phone. A sharp image looks great on a small screen, and you can zoom in without losing clarity.
Large files need space. A 36MP photo takes more storage than a standard image. Plan for extra room on your phone or cloud account, especially if the camera sends many pictures each day.
Cropping also works well with high resolution files. You can crop a photo to focus on a deer while keeping enough detail.
Consistency matters too. A clear photo is only useful when the subject sits in frame. Set the camera at a height and angle that captures animals at the right distance.
Clear photos reduce wasted trips. You can check the camera from home and decide if a visit is worth it.
Try a few test shots before you commit to a long season. Walk the area and check the field of view.
Review how the images look at different times of day. This simple step helps you get the most from the sharp results.
Keep the lens clean, too. Dust or water spots can soften an image, even on a sharp sensor.
Trigger Speed and Capture Modes
Trigger speed decides whether you catch the action. A quick trigger records the animal before it leaves the frame. Slow triggers often miss the best part of the visit.
Pick the capture mode that fits your goal. Photo mode works well for checking a feeder or a gate. It saves space and keeps your phone alerts simple.
Video mode shows movement, behavior, and timing. You can watch how a deer moves along a fence line. Short clips also reveal which trails see the most traffic.
Time lapse modes cover long stretches of time. They take images at set intervals, so you see changes across a day or week. This view helps you track seasonal patterns on your land.
Plan your settings around your daily routine. Use shorter intervals during busy hunting weeks. Longer gaps save battery and card space when activity stays quiet.
Test each mode before you commit to a long season. Run a week in photo mode, then compare results with video clips. Your own footage will show which setting gives the best results.
Watch the trigger timing in real light conditions. Dawn and dusk often bring the most movement. Check whether the camera catches animals moving at normal walking speed.
Keep your trigger settings simple at first. Change one setting at a time so you know what works. Small tests give clear answers without wasting memory or battery life.
Fast movement near the edge of frame can still slip past a camera. Mount the unit at a slight angle to cover the path. This setup gives animals more time in view. Check the frame after each adjustment. Small changes often make the biggest difference.
Cellular Connectivity and App Experience
Signal strength decides how well this camera performs. Before you mount anything, walk your property with your phone. Check the bars for your carrier at each spot you plan to use.
Hunters often pick the best tree first. Then they discover the signal is weak there. Move the camera a few yards or find a higher spot. A clear line to the sky helps a lot. Trees and fence posts can block signals too.
Test the app before the season starts. Set up the camera and send a few test photos. Watch how long each image takes to arrive. Then adjust the spot or angle until the results feel steady.
Notifications can get noisy fast. Turn on alerts for the cameras that matter most. Quiet the rest so your phone stays useful during the day. Name each camera by location, like north feeder or creek crossing. Clear names help you sort photos fast.
Plan for battery use too. Frequent photo uploads can drain power faster in cold weather. Keep spare batteries handy during deep winter months. Check the power level each time you visit.
Protect your account with a strong password. Your photos reach your phone through an online account. Use a unique password and turn on two step verification if the app offers it.
Keep the app updated. Updates often fix bugs and improve stability. Check the app store once a month.
Good connectivity makes the whole system easier to manage. Strong signal, clear alerts, and steady updates help you stay in control. Spend a little time on setup now. You will save many trips later. Treat setup as part of the fun.
Top 3 Alternatives
Choosing a trail camera takes some thought. These three options each offer useful features for different needs.
Tactacam Reveal X

Last update on 2026-10-13 / Affiliate links / Images from Amazon Product Advertising API Some of the links on this website are affiliate links, which means that at no additional cost to you, I earn a commission if you click through and make a purchase. I only recommend products and services that I believe will add value to my readers. Thank you for your support!
The Tactacam Reveal X sends photos and videos straight to your phone. That feature saves trips to check your camera.
It shoots sharp images and offers fast trigger speeds. Hunters and wildlife watchers often like its easy setup and clear app.
Bushnell Core DS


Last update on 2026-11-19 / Affiliate links / Images from Amazon Product Advertising API Some of the links on this website are affiliate links, which means that at no additional cost to you, I earn a commission if you click through and make a purchase. I only recommend products and services that I believe will add value to my readers. Thank you for your support!
The Bushnell Core DS works well for people who want a simple option. It uses dual sensors to capture images day and night.
Its battery life lasts a long time in the field. You can leave it out for weeks. Many users say the menu feels easy to learn, even for beginners.
Browning Recon Force

Last update on 2026-11-19 / Affiliate links / Images from Amazon Product Advertising API Some of the links on this website are affiliate links, which means that at no additional cost to you, I earn a commission if you click through and make a purchase. I only recommend products and services that I believe will add value to my readers. Thank you for your support!
The Browning Recon Force suits users who need reliable performance in tough places. It takes clear pictures with quick recovery between shots.
Its rugged build handles rain, dust, and cold weather. Browning designed this camera for long monitoring sessions, so it keeps working when conditions change.
Each of these cameras has clear strengths. Pick the one that fits your needs and your hunting or wildlife goals.
Battery Life and Power Options
Battery life can make or break a season. A camera that goes dark in the middle of a season leaves gaps in your records. Comparison articles say this camera offers better battery life than its older rival. That lead gives you more time in the field between visits. Power problems often show up at the worst time.
Start each season with fresh power. Install new batteries before you mount the camera. Write the install date on a note or in your log. That simple habit helps you track how long each set lasts.
Expect shorter runs in heavy use. Busy spots with lots of movement use more energy than quiet ones. Check the battery condition on each visit during the first few weeks. That shows you the pattern for your location.
Use one battery type for every set. Mixing old and new cells can cause weak performance. Replace all cells at the same time. Read the guide before you choose batteries. Stick with the type it recommends.
Consider external power for long setups. Some hunters pair trail cameras with solar panels or external battery packs. This helps when you plan to leave a camera out for weeks. Confirm that any extra part fits the camera before you order.
Store spare batteries in a dry bag. Keep them away from rain and damp air. Bring a spare set on every trip so you never miss a moment.
Plan your visits around power levels. Think about how long you want the camera to run. Match your battery plan to your visit schedule. A little planning keeps your camera ready when the action comes.
Design, Durability and Setup in the Field
The Spypoint Flex G-36 has a compact body that suits most trees and fence posts. Its slim shape helps it blend into the woods.
Sturdy build matters most in rough country. Rain, dust, and branches can all test a camera over a long season. Check the case seals and latch before you head out.
Mounting height changes what you capture. Many hunters place the camera about waist to chest high. This angle gives a clear view of animal bodies and heads.
Tilt the camera slightly down to the trail. A flat angle often misses animals walking past at a distance. Aim the lens so the trail fills most of the frame.
Watch out for sun glare. Position the camera so the sun does not shine straight into the lens. Morning and evening light can wash out images fast.
Use a locking case or a steel cable lock to deter theft. A lock also keeps the camera from swinging in the wind. Tighten all straps so the unit stays still.
Clear out clutter before you mount. Trim low branches and tall grass in front of the lens. Clear sight lines help the sensor catch movement early.
Handle the SD card with clean, dry hands. Format the card in the camera before each new set. This step prevents file errors later.
Test the mounting every few weeks. Wind and wildlife can shift a loose camera out of position. A quick check saves time and keeps your records consistent.
Overall, this camera feels built for real field use. Careful mounting, secure locks, and regular checks help it last through a full season. Plan each setup with care for the best results.
Twin Pack vs Pro Pack Bundles
Choosing between the two bundles starts with one question. How many spots do you want to watch?
A Twin Pack suits hunters who want two camera angles on one trail or two nearby feeders. This setup gives you a side by side view of animal movement.
The Pro Pack fits a wider plan. More cameras let you scout several zones at once, so think about your property size first.
Next, check exactly what each bundle contains. Compare the item lists closely. Missing parts can mean extra trips to the store. Check the warranty terms too, since they can vary between sellers.
Match the bundle to your season. A pair of cameras works well for a short scouting trip. A larger group suits a full season of tracking deer movement across several stands.
New to trail cameras? Start small. Learn how one unit behaves in your woods, then add more when you feel ready.
Two cameras placed on different trails can show which route animals prefer. A larger group can reveal patterns across an entire property.
Use those patterns to choose better stand locations. You will see where animals travel most often.
More cameras also mean more setup time. You will mount each unit, check each card, and review more photos. Be honest about how much time you have each week.
Read reviews from hunters who used each bundle. Their real world notes often reveal setup tips that a product page misses.
Your land and your goals should lead the decision. Pick the bundle that fits your plan today. You can always add another camera later.
Pros and Cons
Pros
- Sharp 36MP photos show clear detail on every shot.
- The images are a clear step up from older Spypoint models.
- Battery life beats the Flex-M in comparison articles.
- Connectivity is stronger than the Flex-M for getting updates.
- Two bundles let you choose a setup that fits your plan.
Cons
- Large 36MP files fill memory cards faster.
- Cellular features need an active data plan to send photos.
- Detailed images take longer to download and sort through.
- Few field reviews cover durability over the long run.
Who Should Buy It
The Spypoint Flex G-36 fits people who want close, crisp views of wildlife. Its detail helps you tell one buck from another by antler shape and body markings.
Hunters with large properties gain the most from this camera. Covering many acres on foot takes hours, so a camera that reaches you from home saves valuable time.
Ranchers and farm workers can also use it to watch gates, feed areas, and water sources. One camera at a key spot can replace many daily checks.
Property owners who watch for trespassers also find value here. Clear images help you spot people or vehicles at the edge of a field, even from far away.
Wildlife photographers and nature fans can enjoy the image quality too. Each file holds fine detail, so you can crop a photo without losing sharpness.
Families and young nature lovers often enjoy checking the camera together. Every visit feels like a small discovery, and kids learn patience while they wait for new photos.
Some buyers should look elsewhere. If you never plan to use an active data plan, a simpler camera may suit you better.
Hunters in remote areas with weak signal should test coverage before they buy. Cellular service can vary a lot from one valley to the next.
Overall, the right buyer values detail and reach. Take a moment to picture a typical day on your land. Imagine where the camera would sit and what you hope to see. Those answers will show whether this camera fits your needs.
Final Verdict
The Spypoint Flex G-36 is a strong cellular trail camera for people who value image quality. I give it a confident recommendation for most serious users.
The camera also gives you flexible capture modes. You can choose Photo, Video, Time Lapse, or Time Lapse+. Each mode answers a different need.
Photos track animal visits. Video shows behavior, such as how a deer moves along a trail edge.
The X95 trigger adds another useful touch. Spypoint calls it an “extra safe” trigger, so it aims to catch movement reliably. That matters when an animal walks past fast.
Time Lapse suits people who watch a field or a gate for long hours. It records change over time without needing motion. Farmers and property owners will find that handy.
The research names no clear weak points. Still, no camera fits every situation. Read fresh owner feedback before you decide. Check signal strength on your land too.
My verdict is simple. The Flex G-36 feels like a polished upgrade over the Flex-M. It rewards users who want sharper views and more control over how they capture wildlife.
Here is my advice for your next step:
- Decide which capture modes you will use most.
- Pick a spot where you can test the camera early.
- Review your first week of images and adjust the placement.
A small test run teaches you more than any spec sheet. You will quickly learn how the camera fits your routine.
The Spypoint Flex G-36 earns a place on any serious trail. Buy it if you want clear pictures and flexible modes. Skip it only if your land has weak signal and no workaround.
Frequently Asked Questions
Is the Spypoint Flex G-36 easy for a first time user?
Yes, it suits beginners well. Start with Photo mode so you can learn how the camera sees your land.
Can I use it to watch my land at night?
The research does not confirm how the camera performs after dark. Look at sample night images from other owners before you decide.
Can I zoom into details in the photos?
Yes, the 36MP resolution gives you room to crop. You can zoom in and still see clear detail. This helps you spot tracks, antlers, or a visitor near the fence line.
Is it a good pick for a small backyard?
Probably not. The camera fits people with large properties who need long reach. A small yard may not need this level of detail.
Does it record video as well as photos?
Yes, it offers Video mode alongside Photo mode. Test both modes during your first week so you know which one fits your goal.

Hello, I’m Emily Price, the founder of Birds Affection. As a passionate bird enthusiast and spiritual seeker, I’ve always been fascinated by the symbolic meanings and mystical connections between birds and our lives. On this website, I share my knowledge and insights on the spiritual significance of various bird species, exploring their roles as messengers, guides, and teachers. Through my writing, I aim to inspire and educate others on the profound wisdom and beauty that birds bring to our world. Join me on this journey as we delve into the enchanting realm of bird symbolism and discover the hidden meanings behind these magnificent creatures.